


Enjoying a truly immersive virtual reality experience requires not only the best visual setup but also high-quality audio. If you’re looking to elevate your gaming or VR sessions, knowing how to connect AirPods to Meta Quest 3 is essential. The process is straightforward, allowing you to quickly integrate your AirPods with Meta Quest 3, ensuring a seamless connection that enhances your overall experience. Follow the steps below to enjoy crisp, wireless audio that matches the immersive visuals of your VR world.
Ensure AirPods Are Fully Charged and Ready for Pairing
Before you begin connecting your AirPods to Meta Quest 3, it’s important to ensure that your AirPods are fully charged. A low battery can interrupt the pairing process, leading to an unstable connection or audio dropouts during use. By starting with fully charged AirPods, you minimize the risk of encountering these issues, ensuring that the connection process proceeds smoothly and without interruptions. Charging your AirPods also guarantees a longer, uninterrupted VR session, which is crucial for a fully immersive experience.
Before pairing your AirPods, make sure your headset is fully powered on and you can see the Home view.
- Press and hold the Power button until the headset turns on.
- Press the Meta button on the right Touch controller to open the universal menu.
- Select the clock on the left side to open Quick Settings.
- In Quick Settings, choose the gear icon (top right) to open the full Settings app.
- Go to Devices › Bluetooth. Keep this screen open—you’ll pair your AirPods in the next step.
Tip: On recent Meta Horizon OS builds, you may also find a Bluetooth control in Quick Settings. Some builds include an experimental Bluetooth LE Audio option that can help reduce latency with compatible earbuds.
Once you've opened the Settings menu, the next step is to locate the Bluetooth configuration panel. This is where you’ll enable Bluetooth on your headset so it can detect and pair with your AirPods.
- In the Settings menu, select Devices.
- From the Devices section, choose Bluetooth in the left-hand list.
- Turn on Bluetooth by toggling the switch. This activates the headset’s ability to scan for nearby accessories.
- Click Pair New Device to start searching for available devices.
- When your AirPods appear under Available Devices, select them and confirm pairing. Once connected, they will show up under Connected Devices.
Tip: On the latest Horizon OS versions, Meta Quest 3 also supports Quick Pairing. If your AirPods are in pairing mode and near the headset, they may pop up automatically without needing to scan manually.
Put Your AirPods in Pairing Mode by Opening the Case
Before your Meta Quest 3 can detect your AirPods, you need to set them to pairing mode. Place both AirPods in the charging case and make sure the lid is open.
- With the case lid open, locate the small setup button on the back of the case.
- Press and hold the setup button until the status light on the front of the case starts flashing white. This indicates your AirPods are in pairing mode.
- Keep the case open and close to your Meta Quest 3 headset during the pairing process.
Note: If the light only turns green or amber without flashing white, it means your AirPods are not in pairing mode. In that case, repeat the steps by holding the setup button longer until the white light flashes.
Select Your AirPods from the List of Available Bluetooth Devices
Once your AirPods are in pairing mode, they must appear in the list of accessible Bluetooth devices on your Meta Quest 3. Navigate through the list until you find your AirPods, then select them to initiate the connection process. The device list is typically organized by signal strength or proximity, so your AirPods should be easy to locate. Selecting your AirPods from this list is the final step in linking the two devices, allowing them to establish a wireless connection.
Confirm the Pairing and Wait for Connection Confirmation
After selecting your AirPods, Meta Quest 3 will attempt to establish a connection. You may be prompted to confirm the pairing on your Meta Quest 3 screen. This step ensures that you are connecting to the correct device and helps prevent unauthorized access to your VR system. Once confirmed, the connection process will complete automatically. A confirmation message will appear, indicating that your AirPods are successfully paired with Meta Quest 3, ready for use.
Test Audio Output to Ensure AirPods Are Connected Properly
With your AirPods now connected to Meta Quest 3, it’s important to test the audio output. Begin by playing any media or starting a game on your Meta Quest 3 to check if the sound is coming through your AirPods. Testing the audio ensures that the connection is stable and that the sound quality meets your expectations. If there are any issues with the audio output, revisiting the Bluetooth settings and checking the connection status can help resolve them.
Adjust Audio Settings for Optimal Sound Experience in Meta Quest 3
To get the best sound experience from your AirPods while using Meta Quest 3, you may need to adjust the audio settings. These settings allow you to fine-tune aspects such as volume, balance, and sound quality to suit your preferences. Ensuring that these settings are optimized will enhance your overall VR experience, providing clear and immersive sound that complements the stunning visuals of Meta Quest 3. Proper audio adjustment is key to fully enjoying your VR sessions.
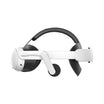
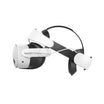
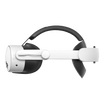
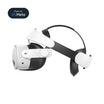
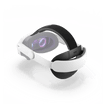
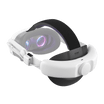
Streamline Your VR Setup with Quest 3 Accessories from Kiwi design
Enhancing your VR experience is not just about connecting the right devices; it’s about using the right Quest 3 accessories to create the perfect setup. VR enhancement accessories from Kiwi design are designed to take your Meta Quest 3 to the next level. We specialize in innovative, high-quality products that seamlessly integrate with your VR system, ensuring that every detail of your experience is optimized. Explore our range of Quest 3 accessories today and discover how we at Kiwi design can transform your virtual reality experience.

Leave a comment
All comments are moderated before being published.
This site is protected by hCaptcha and the hCaptcha Privacy Policy and Terms of Service apply.